
We set out on a bright sunny Saturday morning at about 7.30am as Country Love Ceramics is about 2 hours drive away. Even though we had to travel on the M25 we arrived in Abingdon Oxfordshire in good time. We met Andy who would be taking the course for the day and spent a good hour talking to him about different techniques and ideas. He was really helpful and inspirational.
After a welcome cup of coffee we sat down to our task for the day -to produce a 35cm platter with a complex Moorish pattern. The blank bisque surface looked quite daunting!
Step 1: We turned the platter upside down and centred it on a banding wheel (to centre it we placed a paint bottle at the side of the platter and spun the wheel. If the platter was very close to or touched the bottle we moved the platter away slightly until there was an even gap all the way around between the platter and the bottle). Centering was a bit tricky at first but we got the hang of it, it will never be absolutely perfect as the platters are not perfectly round.


Step 4: Having brushed on the first coat of colour we then banded another 7 coats of the top colour to give a smooth, circular finish with no brush strokes. Our plates then looked like this:

That was the easy bit! Now for the moroccan design........
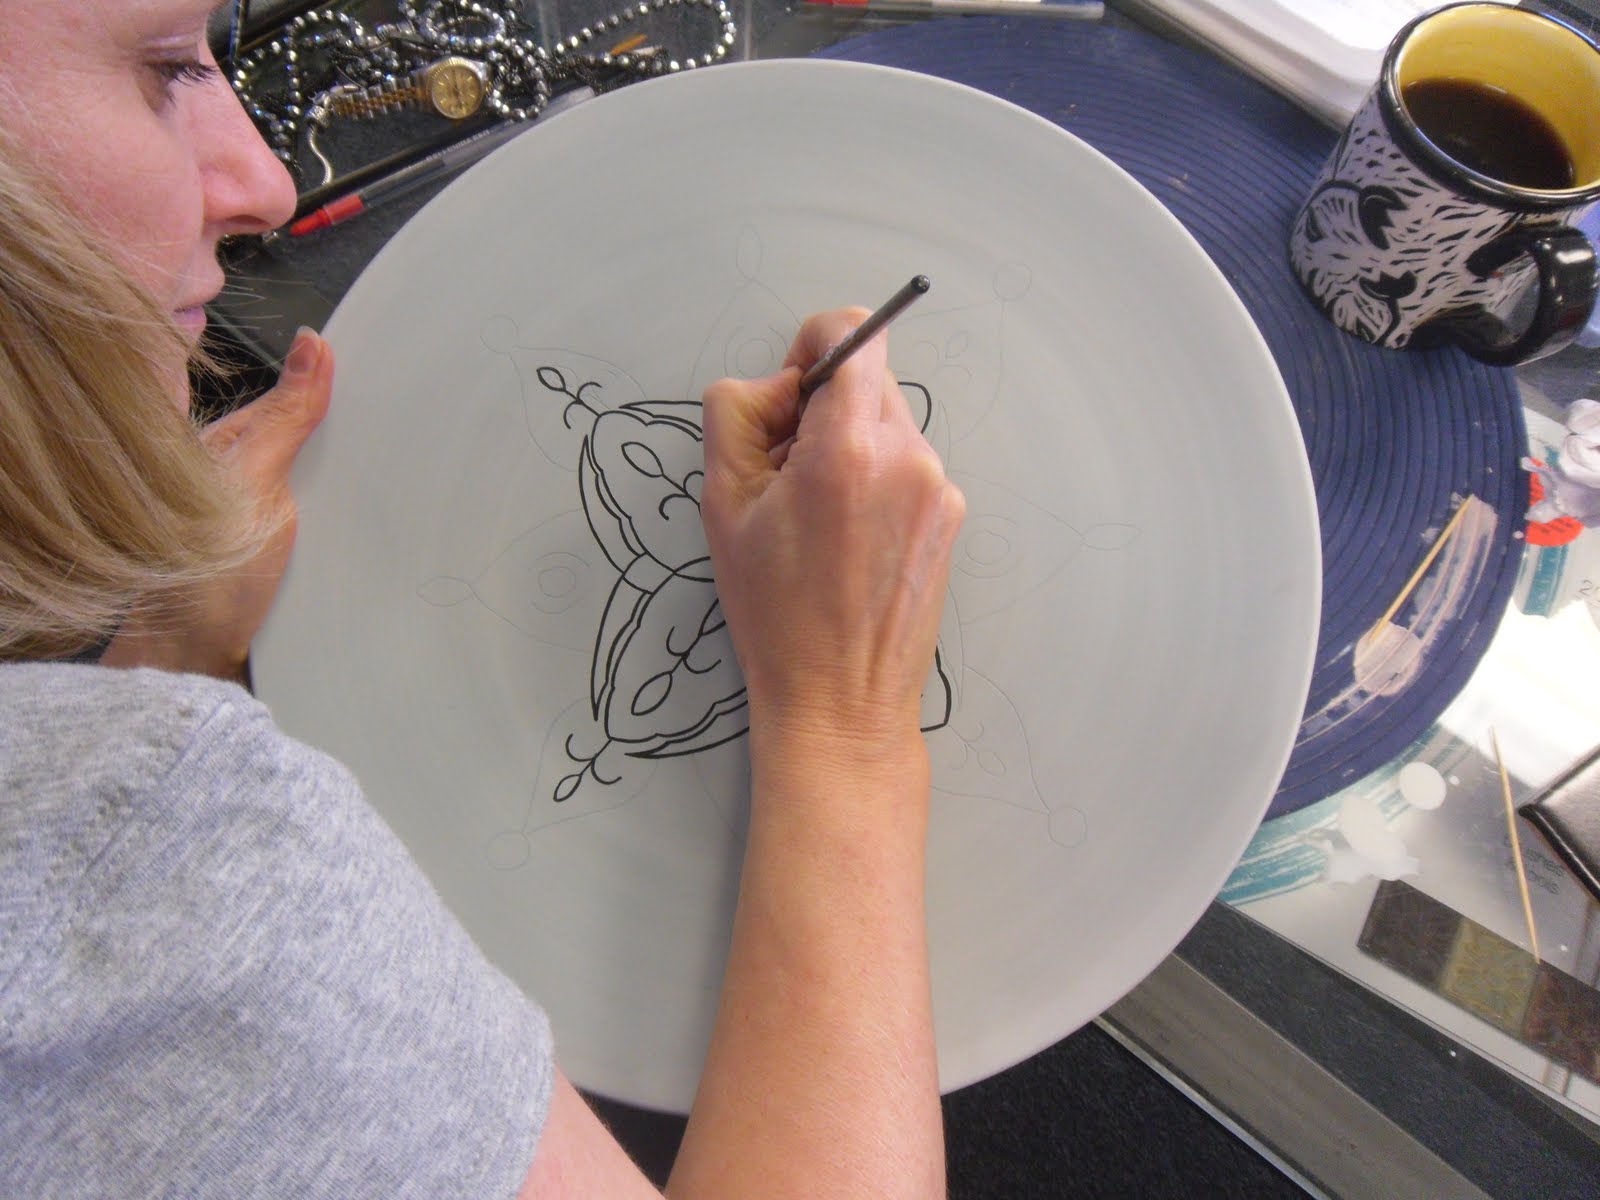
Step 5: Andy gave us a photocopy template of a hand drawn design which we placed onto the centre of our platter. We then gently drew over the design with a red pen, enough to indent the pattern on the paint underneath but not so hard as to score the paint through to the bisque surface.

Step 6: Having gone over the whole design in red biro we removed the template and began to paint over the scored design on the platter with black Duncan EZ Stroke. This is a great product for lots of different uses especially kids handprints (gives fantastic definition). It has very little glaze in it so it very easy to apply to the bisque surface giving the feel and look of watercolour.

Step 7: When the middle part of our total design was completed, we painted a EZ stroke black banded line, approximately 3cm from the edge. Andy did this for us because if it went wrong we'd have to start all over again! He used quite a large flat brush full of paint (slightly diluted) so as not to run out half way round.
If you are nervous about doing this, like us, you can practise on plain bisque with just water.

Step 8: With the black circular line in place we went on to decorate the rim. We used a segment divider (one can be found on Andy Skinner's website) to mark equal sections around the rim and then hand drew triangles around the rim of the platter. We then added the detail of a small circle and like inverted brackets. This was all done with the EZ Stroke black paint again. Always best used with a little water as it dries out quite quickly.

Step 9: Next, working from the middle out so as not to smudge your work as you go, use Hobby Colorobbia HC0440 Copper Green to do very small dots around the bud and small circle shapes of your design and in the 'wing' type shapes. Just use the wooden end of your brush to place small dots of this metallic paint (will fire to a silver finish). Then, this bit is easy, use black EZ Stroke and the wooden end of a larger brush to paint large black dots randomly all over the centre area between your main design and the banded circular line (for both paints dip the end of your brush into the paint every time you do a dot to ensure the same size.) You can put your dots where you like, you do not have to follow this design.

Step 10: Sorry I forgot to take a picture of the next bit (I think I was seeing dots by now!) but it is simple.All you do is paint alternate black and metallic dots in each empty triangle around the rim in exactly the same way as above. We found it easier to put a felt pen mark in the triangle you are going to paint with black dots and paint them first otherwise it is really easy to get carried away and mess it up (as I did!)
And here is the painted platter before it goes to the kiln to be fired.

Step 11: After the platter had dried out thoroughly we fired it to Cone 06 and the beauty of it was that Duncan Concepts underglaze paints give such good coverage we didn't even need to glaze it!
The finished piece - Ta Da.......

We had a fantastic day doing these and thanks to Country Love and Andy Skinner. Let me know what you think by posting a comment below. Thanks for reading.


No comments:
Post a Comment