This is a cupcake bisque plate from Duncan which has the cupcake design embossed onto the surface already so no design work needed. Just start painting straightaway!

I started by painting the cupcake case in Mayco Stroke and Coat Blue Yonder (SC11) and Toad i lily Green (SC52). The icing is painted in Pink-a-Dot (SC70) and highlighted in Rosey Posey(SC18). The candle is these three colours SC70,11 and 52) in stripes and the candle is Orange-a-peel (SC75) and Sunkissed (SC06). I just added a couple of straight lines aroung the flame to add some detail.
For the rim I diluted some more Pink-a-Dot (SC70) and used a sponge brush to cover. I gave this a good three coats so as not to see any brush marks. Using carbon paper and EZ Stroke I added the text and then dots and swirls with my Kemper tools. Just to finish off I put a small row of Sunkissed dots around the inner edge of the rim. And all done....
So this is how it looked prior to glazing and firing. I use Hobby Colorobbia glaze as it never lets me down so dipped the plate in that and fired at Cone 06 for about 8 hours.

And this is the finished result........ Ta Da!

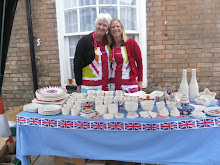
This particular plate will be used as our demo piece and will be displayed in Catering Compliments in Maidstone as part of the Art Trail along with a couple of other pieces however it can be personalised and ordered as a commission piece at any time. If you would like to order one just get in touch.
Below is another example that my Mum painted. She started with a plain bisque heart plate from Country Love ceramics and marked it up in felt pen (which burns off in the kiln) with the Union Jack pattern. Then using a Rubber Tapestry Poinsettia stamp and Potters Pads in red and blue she stamped the pattern in alternate colours on the plate.

Again the plate was dipped in Hobby Colorobbia clear dipping glaze and fired at Cone 06 for 8 hours and came out like this. A pretty, floral interpretation of the Union Jack. Just right for the Jubilee celebrations.


No comments:
Post a Comment